Showing posts with label Pizza. Show all posts

Wednesday, May 11, 2011

Pizza Night & Guest Recipe Share- Eclair Cake

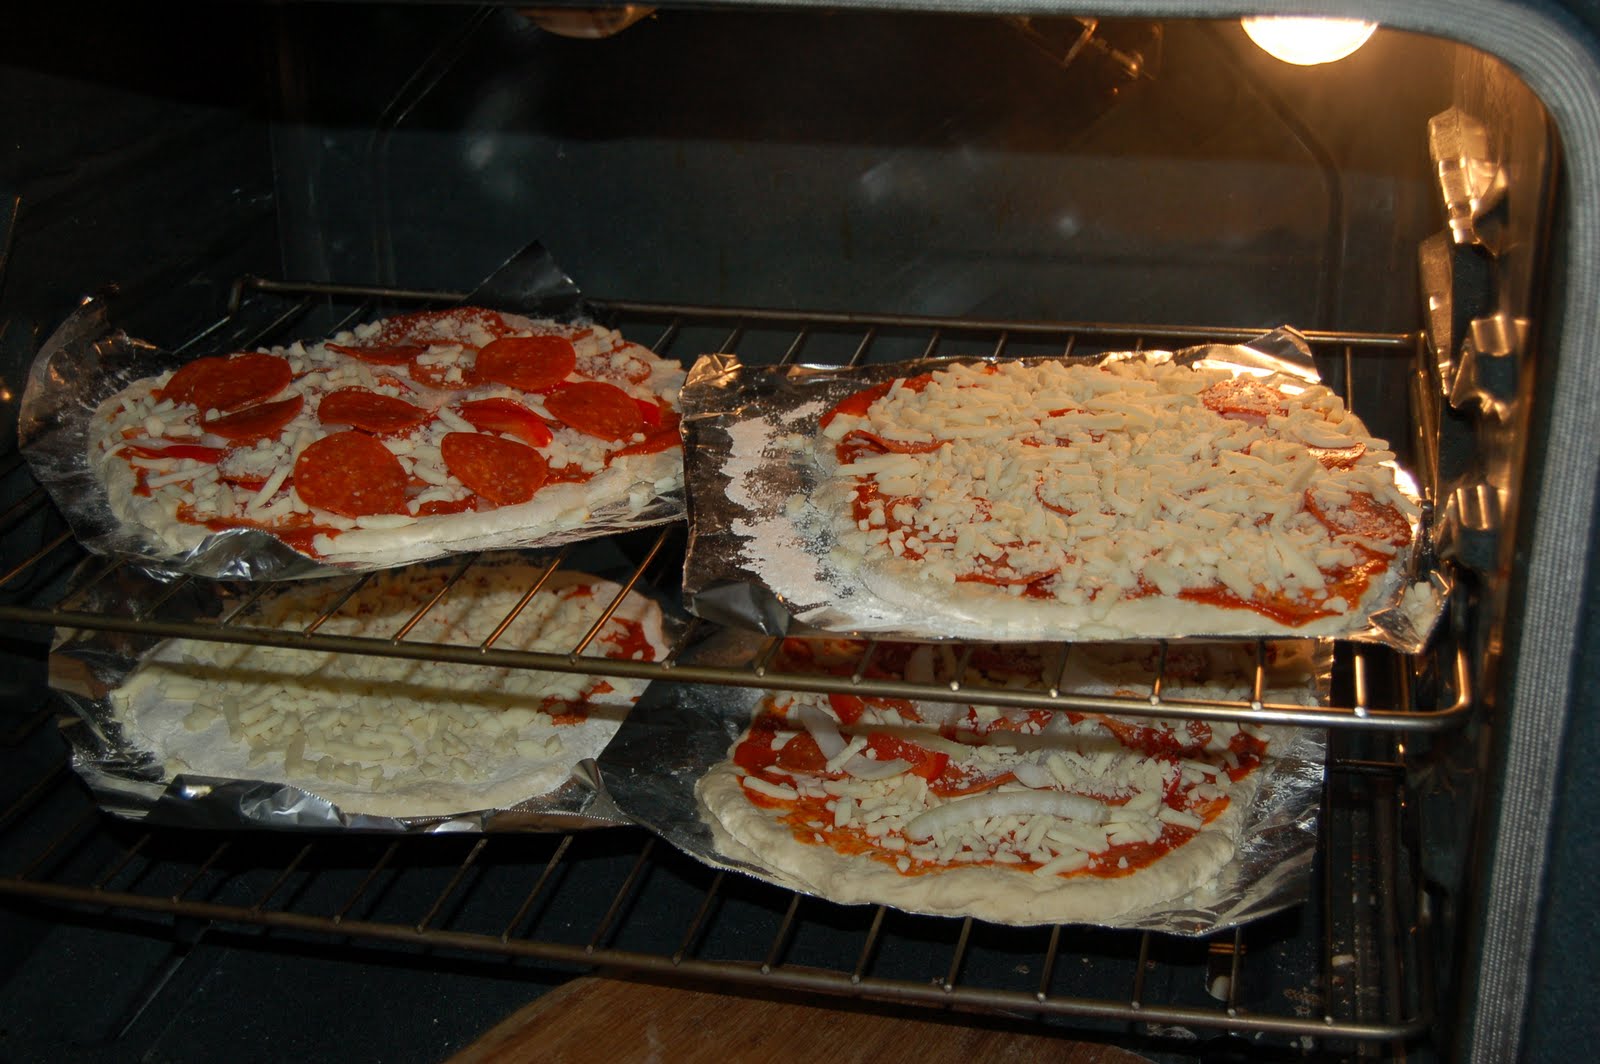
On Saturday night we had Matt, Kerry and their kids Morgan and Thomas over for make your own pizza night! Kerry also brought the most amazing eclair cake over for dessert (check out the recipe below.)

I made the dough before hand so it was well risen and ready to go (I wish I would have taken a picture, it was huge.) Matt and Morgan making their own personal pizzas.
 We cooked some in the oven and some on the grill to have them all ready at the same time.
 David was showing Matt his timer watering sprinkler system for the garden. They were looking at it and then it all the sudden turned on and they got wet (if they would have looked at the time, they would have known it was coming.)
 Kerry, me and the kids. Aren't they adorable?
 Our final pizza masterpieces fresh out of the oven/grill.
 David had fun setting up the limited number of toys we keep at our house for kids to play with.
 Kerry brought the most amazing dessert and is sharing the recipe with you all! THANKS Kerry, We loved it!!
 Eclair cake

1 box graham crackers
2 boxes vanilla instant pudding
4 cups milk
1 16 oz tub whipped cream
1 jar chocolate frosting

Put 1 layer of graham crackers on the bottom of a 9 x 13 pan. Mix pudding mix and milk and then fold in whipped cream. Pour some of the pudding mixture in a layer over the graham crackers and top with another layer of graham crackers. Continue layering, ending with graham crackers. Cook the frosting on half power for 1 minute in the microwave and pour over the top and spread evenly. Refrigerate until set (at least 2 hours)
 It reminds me of smores! You should try it really soon.
Pin It

Thursday, April 28, 2011

Whole Wheat Pizza Bread

It's no secret that I love pizza. Mozzarella is the only cheese that I love (only melted though) and can't get enough of it on my pizza. I adapted a recipe from Picky Palate to make it a little healthier. She uses real flour and buttermilk. I read online that you can add 1 Tablespoon white vinegar or lemon juice to make buttermilk and since I hate buying a whole thing of it and never using it that's what I did.

Ingredients-
1 cup all-purpose flour (I used wheat flour)
1 1/2 teaspoons baking powder
1/4 teaspoon baking soda
1/2 teaspoon kosher salt
1/2 teaspoon freshly ground black pepper
2 large eggs
2 tablespoons extra virgin olive oil
3/4 cup buttermilk (I used regular milk and 1 TBSP lemon juice)
1/4 cup shredded Parmesan cheese
1 1/2 cups shredded Mozzarella cheese
1 cup quartered pepperoni slices, about 32 slices (I used turkey pepperoni)
1/2 cup marinara sauce
1 teaspoon Italian Seasoning
1/4 cup shredded Parmesan Cheese
 1. Preheat your oven to 350 degrees. 2. Place flour, baking powder, baking soda, salt and pepper into a bowl and combine with a mixer. I used my Kitchenaid mixer, but don't use the dough hook, just the flat mixer beater.  3. Slowly add in eggs, oil, buttermilk, Parmesan, Mozzarella and pepperoni until just combined.
 4. Spray your bread pan with cooking spray. Pour half of batter into prepared bread pan that measures 9x5x2 3/4-inches. I used my meatloaf glass pan and have no idea how big it really is. Top evenly with marinara sauce.
 5. Pour remaining batter over sauce.  Top with Italian seasoning and additional Parmesan cheese. Bake for 45-55 minutes or until a toothpick comes out clean from the center.
6. Let it sit for 30 mins once it comes out of the oven. I know that it kind of looks like meatloaf, but I promise it tastes really good. The darker whole wheat makes the bread darker than it would with regular flour.
It was so good and I love that you can see the pepperoni throughout the bread. Tip- Did you know that you're suppose to store whole wheat flour in the freezer or refrigerator? I had NO idea, why didn't anyone tell me that? I was reading this blog article on 100% whole grains and realized that I wasn't doing it. It can actually go rancid and there was mention of little bugs. Needless to say I threw mine away (it had only been open for a week so it was fine) but I was paranoid and need to buy more. Pin It

Friday, March 4, 2011

Pizza Stuffed Pretzels!

I've been meaning to post this recipe for a few weeks, but have been busy blogging about trips so here it is finally. My pictures weren't as detailed so some of these come from Joy in My Kitchen.

Pizza Stuffed Pretzels -
1 lb. dough or store bought.
Tomato paste or sauce
Italian Seasoning
Cheese, shredded (I just used mozzarella)
Turkey Pepperoni
Olive oil
 Cut the dough into 4 parts and roll them out into thick pieces.
Slice the pepperoni into thin slices, and shred the cheese. Spread each piece of dough with tomato paste, and top with pizza toppings.
Seal up the dough over the toppings.
Shape into a pretzel (see instructions on making a pretzel). Measure out about 1 tsp. olive oil. Dip your finger in it and rub it over the pretzels. Sprinkle Italian seasoning over the pretzel. Bake at 425 for ~15 minutes until lightly browned.
Serve warm with marinara sauce and enjoy!
Pin It

Tuesday, February 1, 2011

Whole Wheat Pizza

 We decided to make some healthy pizza this weekend since we won't be having much bread this month. Start with my best crust ever recipe but substitute whole wheat flour.
 We were also borrowing Darrin and Staceys nice Nikon D50 camera so we took way too many photos to test things out. I won't bore you with all those, we'll stick to the main photos.
 I had a frozen fajita vegetable kit in the freezer so I microwaved those and added them with black olives to top our pizza.
 Since it was so nice out we decided to grill our pizzas. We put them on foil and cook it on the opposite side you are putting toppings on for about 5 mins. Bring your dough back inside, flip it and put your toppings on and back to the grill they go.
 Cook them for another 5 mins on the grill.
 It came out so yummy and we had a ton extra so I brought it into work for the girls to eat since I can't eat this stuff until month 2.
We decided to sit in the dining room at way opposite ends since we never enjoy that space. 
Here is Davids artistic wine shot, since these will be our last drinks for a few months. I know I haven't posted about the green way trail walking we did on Saturday with Molly, but I had them on my other computer so I will post them later this week. Pin It

Monday, December 6, 2010

Weekend Update and Best Pizza Crust Recipe

This weekend we spent some time with friends, but we mostly went shopping around, cooking and David did a project (more on this later). It isn't the fun kind of shopping either, although I do find grocery shopping fun. When our power went out because of the tornado activity on Tuesday, we had to throw away most of our food. We went to 3 different stores (Sams, Kroger and Walmart) and spent close to $300. There is also another reason for spending that much. I volunteered to help cook meals for some of the families staying in hotels because they can't go back to their homes for a long while. I start on Wednesday for a Mom and her 5 children. I'll share some of my recipes I tried, some I decided halfway through aren't kid friendly, but I'll save them in my freezer just in case or we'll eat them. Now, I want to share with you the best pizza crust recipe we've found so far. 

Ingredients-
1 pk dry yeast
1/3 c warm water
1 t sugar
1 c cold water
2 T olive oil
1 T sugar
1/4 t garlic salt
1/2 t salt
1/2 t dry oregano leaves
3- 3 1/2 c flour

Directions- 
Sprinkle yeast over warm water and stir in the sugar. Let stand about 5 mins or until its very bubbly. Combine the remaining ingredients and about half the flour. Use your dough hook (kitchenaid Mixer) and beat to a smooth batter. Beat in the yeast mixture and continue to add the rest of the flour. Work it into a ball with your dough hook and when it starts to form the ball you can take it out and hand knead a few times if you'd like. Make sure to use a lot of flour as my dough ball was quite sticky. Place it in a bowl with a little pam or oil  with a lid set on top (not tightly closed) or a big ziplock bag sprayed with Pam inside. You can let it sit in a warm sunny spot, or sometimes I turn on the oven and place it on top of the stove/counter area (no direct hot air should touch it though). Once it has doubled in size (approx 30-60mins) punch it down and form your pizza. We have done round pizzas but we decided to place it on a baking sheet in a big square shape. Make sure you grease your pans and put cornmeal down to prevent sticking. Put your toppings on and here is the trick. Let it rise AGAIN in a warm spot for 20 mins. Bake at 450 for 15-20 mins.
We put sausage and black olives on ours.
It came out great and tasted so good. You must give it a try. It makes buying a pizza seem silly.You can also make your dough ahead of time and freeze it, just don't let it rise that second time. Thaw it for 30 mins and continue from there.
Pin It

Thursday, September 16, 2010

#1 Garden Grower, Late Bloomer and a Pizza Quesadilla

With the summer hopefully being over soon, I wanted to share with you what has grown the best in the garden. This herb is really out of control, in a good way. I have never run out of it and have shared with people numerous times. If you are ever thinking about growing some herbs, you need to add BASIL to your list. It's the gift that keeps on giving and growing.
It is literally 2 feet tall. The cucumber leaves are what looks yellow coming through some of the basil. The oregano you can see to the right is also growing really well.
I had lost hope for any kind of tomato to grow this year, but I was surprised when I went out there the other day to find these! Could these be my little tomatoes starting to grow very late in the season?
I also said I was going to post on apple dumplings that I made, but I have had a little stomach bug and really don't want to look at anything I ate before I started feeling bad so I won't be showing that. You can read the Pioneer Womans recipe since that is where I got it from. It was really simple and good though. For dinner this week the only thing that has sounded good is what I like to call pizza quesadillas.
I started with a wheat tortilla and sprayed my pan with cooking spray. Then you just add sauce and cheese and any pizza toppings you like. I had chicken on mine the night before. Wait for the cheese to melt a bit and then put another tortilla on top and flip it over very carefully. Cook for a few more mins until the bottom is brown.
There ya go. So easy and it only takes about 5 minutes and you have dinner!
Pin It

Thursday, August 26, 2010

Stuffed Pizza Bites

I really thought I had posted this recipe before, but I couldn't find it on here so if I did here is a refresher. These are stuffed pizza bites from Our Best Bites. They are so good and different from your average pizza night pizza. You can really fill them with anything. I made my dough and went with pineapple, ham and mozzarella cheese.
Ingredients-
1 roll refrigerated pizza dough* (click here to make your own)
marinara/pizza sauce 
2 T grated Parmesan cheese
1 T olive oil or melted butter
1/2 t garlic powder
1 t dried Italian seasoning
mozzarella cheese
Pizza toppings of your choice: ie, ham and pineapple, pepperoni slices, sausage, etc.
s
Preheat oven to heat specified on pizza dough package. Usually it's 400 degrees. If you make your own dough, 400 is usually a good heat as well.

Unroll your pizza dough onto a lightly floured surface. Pat or roll the dough so it's about 12" by 8". You're going to want to cut it into 24 squares, so just eyeball it if you need to. Use a pizza cutter to slice the dough into 24 square. I used homemade dough so I split my big ball into 2 so it was easier to work with. I just made squares and didn't worry about how many there were. As you can see, mine aren't perfect squares either, it doesn't matter. 
Place cheese and desired toppings on each square. (Note that you're not putting the marinara sauce on the dough- it's for dipping after). Leave rooms on the sides of your squares to wrap them up.
When all of your dough squares have cheese and toppings on them, carefully lift up each square and wrap the dough around the toppings. Pinch to make sure each ball is sealed shut and then place them seam side down in a lightly sprayed pie pan (or similar sized dish).

Brush the tops of the dough balls with olive oil or melted butter and then sprinkle with the garlic and Italian seasoning and top with Parmesan cheese.

Cook them in the oven for about 15-20 minutes or until golden brown on top. Keep an eye on them! Doughs vary, so I'd check them after even 10 minutes.
They are really good and would make great appetizers for gatherings, too.
Pin It

Sunday, March 7, 2010

Hawaiian Alfredo Pizza

We love to make our own pizzas and this is a great recipe to change things up toppings wise. We use the kitchenaid mixer to make the dough, let it rise and cook it up. We did this on the weekend since the dough has to rise an hour, it can eat up your week night. This recipe comes from The Fairhope Foodie. She has some great, easy recipes that I love. She also pairs her meals with Publix shopping trips. This is a combination of Hawaiian and Alfredo pizza.

Ingredients-
2 Pizza Crusts (Standard Size) We used homemade dough from here
2 boneless skinless chicken breasts, cooked and sliced (optional, we left out)
3/4 cup Classico Sun-Dried Tomato Alfredo Sauce
16 oz. pineapple tidbits (or cut pineapple chunks)
1/2 cup sliced olives
1 cup sliced canadian bacon (or sliced ham)
4 cups shredded mozzarella cheese
Parmesan Cheese


Directions-
Divide alfredo sauce evenly among pizza crusts. Top with ham, sliced chicken, pineapple and sliced olives. Top with shredded cheese. Bake in a 450 degree oven for 12-15 minutes or until golden on top. Serve with Parmesan cheese.

The alfredo sauce was so yummy! 
Pizza ready to go into the oven. Molly is looking on for any droppings.

This pizza was sooo good! I would like to make it again right now! 
Pin It

Friday, February 5, 2010

Sausage Calzones

We love making homemade pizza dough with our kitchenaid mixer. So we thought this calzone recipe would be great and it was! We use the basic dough recipe that came with the mixer, which I can share with you in a later post. David then ran the dough through the pasta maker step 1 attachment to make it thin and smooth instead of rolling the dough out by hand. It actually worked pretty well. This recipe which I got from The Fairhope Foodie Blog uses Pillsbury type dough (which is easy to use if you don't want to make your own).

Ingredients-
1 lb. Italian sausage (was on sale last week!)
1/2 cup onion, diced
1/2 cup green pepper, diced
1 clove garlic, minced
1 can olives, sliced
1 8-oz. jar pizza sauce (more for dipping)
2 tubes refrigerated pizza crust
1 8-oz. bag of shredded mozzarella cheese
1/2 cup Parmesan cheese

Directions:
Preheat oven to 400 degrees.
Cook sausage in a medium skillet until browned, breaking up the chunks with a wooden spoon. Drain off excess fat. Return to pan and add onion, garlic and pepper. Cook for about 5 minutes, or until the vegetables soften. Stir in pizza sauce and sliced olives.
Unroll one package of pizza dough across the entire rectangular baking sheet or baking stone. Sprinkle half of the cheese in two rows on the dough with about 2-inches in between (remember you're making two long calzones). Top cheese with the meat & sauce mixture, dividing evenly between the two rows. Top each row with the remaining cheese.

Unroll second package of pizza dough and stretch to cover the top of the first. Press along the edges to seal. Press down the center creating the two calzones. Use a pizza cutter to cut down the center of the dough, making two separate calzones. Press the seam to seal. Lightly brush with olive oil and sprinkle with Parmesan cheese. Cut five two-inch slits in top of each calzone to vent.

Bake 22-25 minutes or until golden brown. Serve with extra sauce for dipping.

Mmmm This was by far the best calzone ever!!
Happy Weekend! Pin It
 
Blogging tips